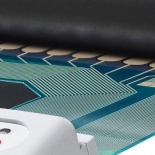
Web Converting Alignment Sensors
Reduce down time and improve yield with comprehensive nip pressure mapping for your converter.Real-Time Nip Pressure Profiling
Misaligned bearings, uncoordinated hydraulic pressure, or imperfect rollers can lead to lost productivity in wasted run time, troubleshooting, and wasted material. Setting up machines quickly and accurately are paramount for production.Take the guesswork out of adjusting rollers by accurately and quickly measuring roller profiles to correct misalignment issues and uneven pressure distribution.

Tekscan sensors measure nip force and width at locations along the axis at various hydraulic pressures providing real-time feedback on a PC. The detection of crowning and differences in pressures and contact width along the length of the roll can be documented. These measurements improve costs by reducing machine set-up time, down time and product scrap.
Key Benefits:
I-Scan™: a R&D tool with a full software package for in depth analysis ideal for small nip rollers as well as high temp applications.
NPAT™: a simple machine set-up tool that is easily used by anyone. It is ideal for large areas and is very portable with one set of electronics. NPAT captures nip width and contact area.
- Real-time nip pressure profile allows operator to see impact of adjustments
- Thin flexible sensors are minimally invasive to rollers while collecting data
- Save measured date for calibration reference or quality control records
- Identify
- Crowns
- Roller deflections
- Misalignment
- Diameter variations
Nip Pressure Measurement Systems – Products and Solutions
Tekscan offers two solutions for nip roller applications:I-Scan™: a R&D tool with a full software package for in depth analysis ideal for small nip rollers as well as high temp applications.
NPAT™: a simple machine set-up tool that is easily used by anyone. It is ideal for large areas and is very portable with one set of electronics. NPAT captures nip width and contact area.
